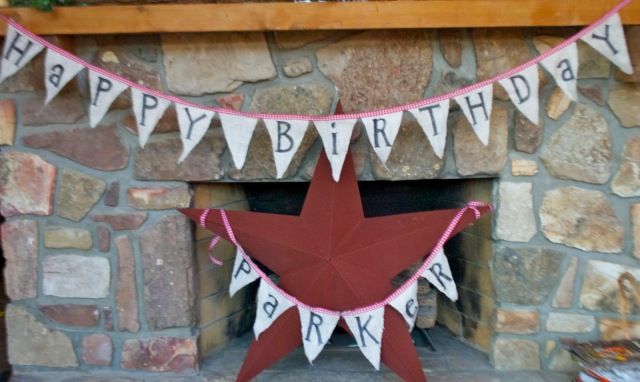
I’ve had a couple of requests for the instructions for the DIY birthday banner I made for my baby’s 1st birthday party. It was so incredibly easy and cheap to make, and very versatile, too.
Here’s what I did:
I started by cutting burlap triangles. I was in a hurry, so my cutting was a little sloppy. But hey, it’s a 1 year old birthday party. Who cares?
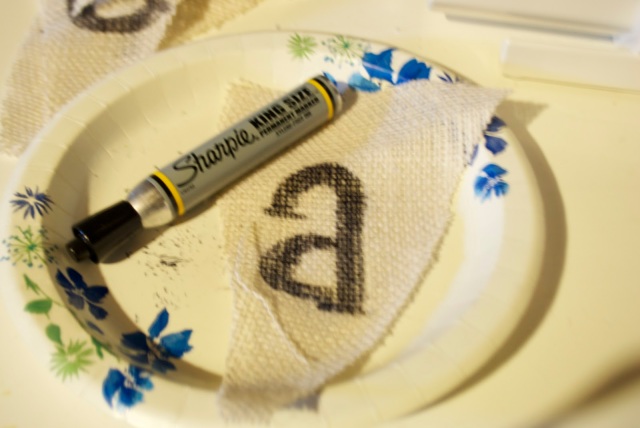
Next, I freehanded the letters with a Sharpie marker. Yep, I just used a Sharpie and drew the letters on the burlap triangles (I used a paper plate to write on so I wouldn’t have any bleed-through). You could really dress this baby up with some stencils, but freehanding was the quickest solution for me.
Then, I trekked into the deepest pits of my parent’s basement to my trusty ole’ sewing machine. I had to pause for a moment of silence when I stumbled on this glamour portrait of myself, hidden in a shoe box:
Ahh….folks, as you can see, I am the poster child for bad hair styles. After my mom scarred me for life by giving me a mullet, she tried to redeem herself with the ultimate feathered bangs. Some poor, innocent soul took ‘glamour’ pictures of me. Nothing screams ‘glamour’ like feathered bangs, buck teeth, and gigantic clip-on earrings.
I need counseling.
Anyway, I sewed the burlap triangles to ribbon using a basic stitch. I spaced the triangles about 1/2 inch apart.
I am in no way a whiz with my sewing machine, so this was really easy and simple and took very little time. The stitching doesn’t have to be perfect, it just needs to hold the burlap in place.
Finally, I trimmed any loose ends from the burlap.
This was super easy to make, and it can be made much neater than I did it. I’m working on a ‘Merry Christmas’ banner right now, and for it, I’ve measured the triangles, and cut them more carefully. I’ve also made font stencils by printing letters on cardstock and cutting them out. So you can really dress this baby up.
I actually really liked using the Sharpie for the letters. It made the process easy. It worked well, plus it gave it a little more ‘rustic’ look.
‘Happy Birthday’, ‘Merry Christmas’, ‘Give Thanks’, ‘Children of Bad Haircuts Anonymous’……the banner possibilities are endless, friends!
Have a blessed Tuesday, and don’t forget to vote 🙂


Very cute. I love simple, low cost decorating ideas. This one fits the bill.
LikeLike
Adorable – I love all you do with burlap! Also… love the Glamour Shots!! I have a few of those sitting around in a folder that only get to see the light of day when I'm, um…. not around and someone else wants to laugh? You're a brave -and gorgeous- lady to share that with us. The feather boa takes the cake for me (you went with darker color than any of mine – I chose a “delightful” Barbie pink…..hehehe)
LikeLike
That Glamour Shot will forever be burned into my brain! 😉
LikeLike
o wow!!! very very creative!!
http://infinitelifefitness.com
http://mscomposure.blogspot.com
LikeLike
This is perfect! I'm planning Sullivan's first birthday (and it's breaking my heart a bit) and need some ideas for decorations. Looks I'm headed to Michaels this weekend for some crafting! And the glamour shot….wow….that's all I can say about that. You are very brave to post that.
LikeLike
I want to comment on how awesome your banner is (loving the rustic look!), but I can't. Your glamour portrait has left me speechless… So bad, but so cute at the same time!! 🙂
LikeLike
G.L.A.M.O.R.O.U.S. flossy flossy!
But really, that banner is great. I have been wanting to make one in Fall colors so badly. I need to get on it because it started snowing here…
LikeLike
i tried this today for a Christmas banner and have yet to grow the…. to write on it. ive decided i kinda like it just plain:) haha your ideas and results are always great!
LikeLike